Hotspots
Hotspots are a powerful way to UV your meshes quickly and beautifully. They'll automatically generate UVs based on the mesh's geometry, allowing you to focus on your design instead of tedious UV work.
Intro to Hotspots
You first need a hotspot texture. The hotspot texture contains many different sized rectangles, each with edge wear to define themselves. These rectangles are called hotspot patches, and Scythe figures out the size of the the mesh's face and finds the best hotspot patch for it according to your desired texel density settings.
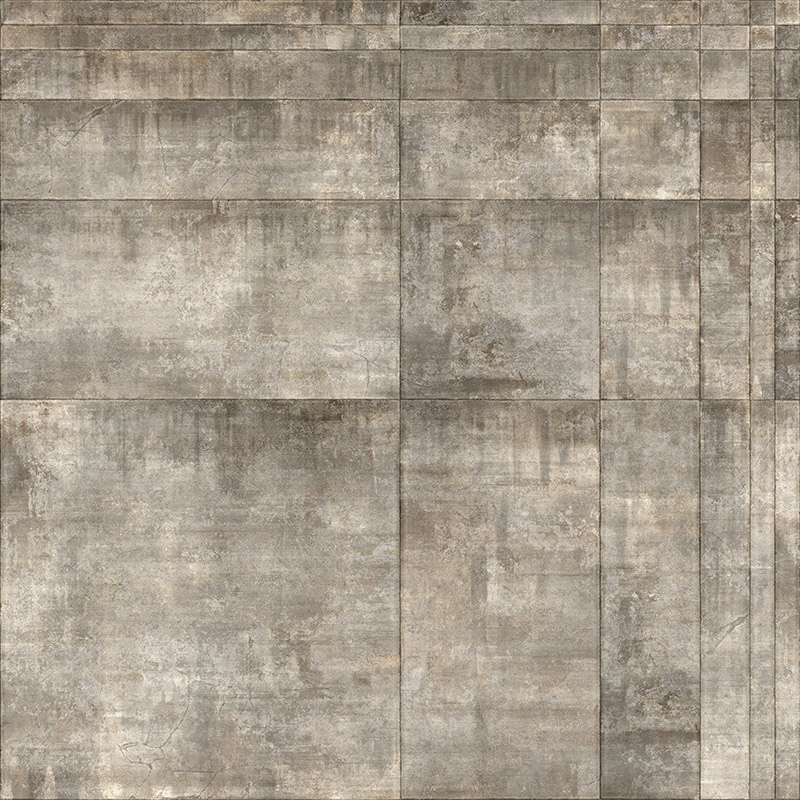 Example of a concrete hotspot texture.
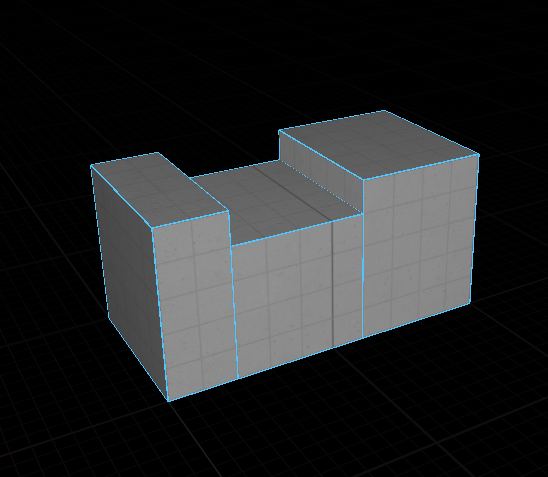 Hotspotting a mesh using
 ![]() Hotspot Individual FacesShift + F
Hotspot Individual FacesShift + F
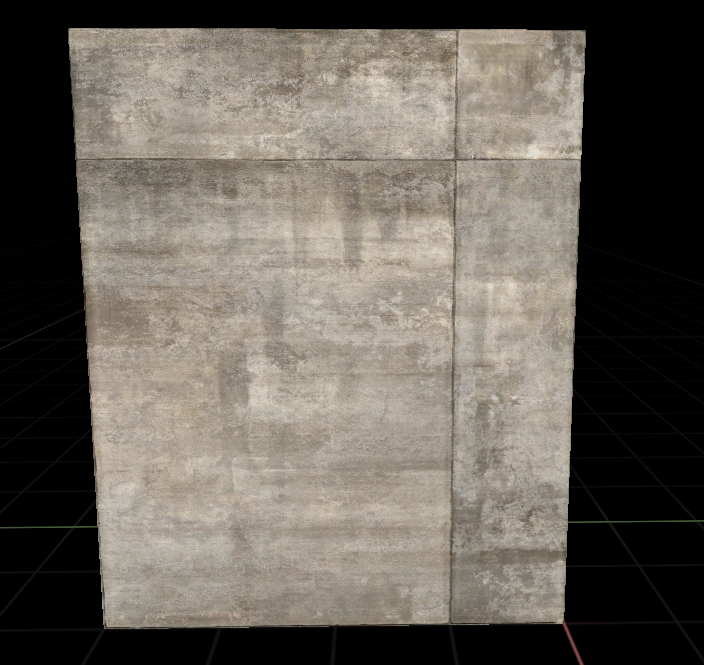
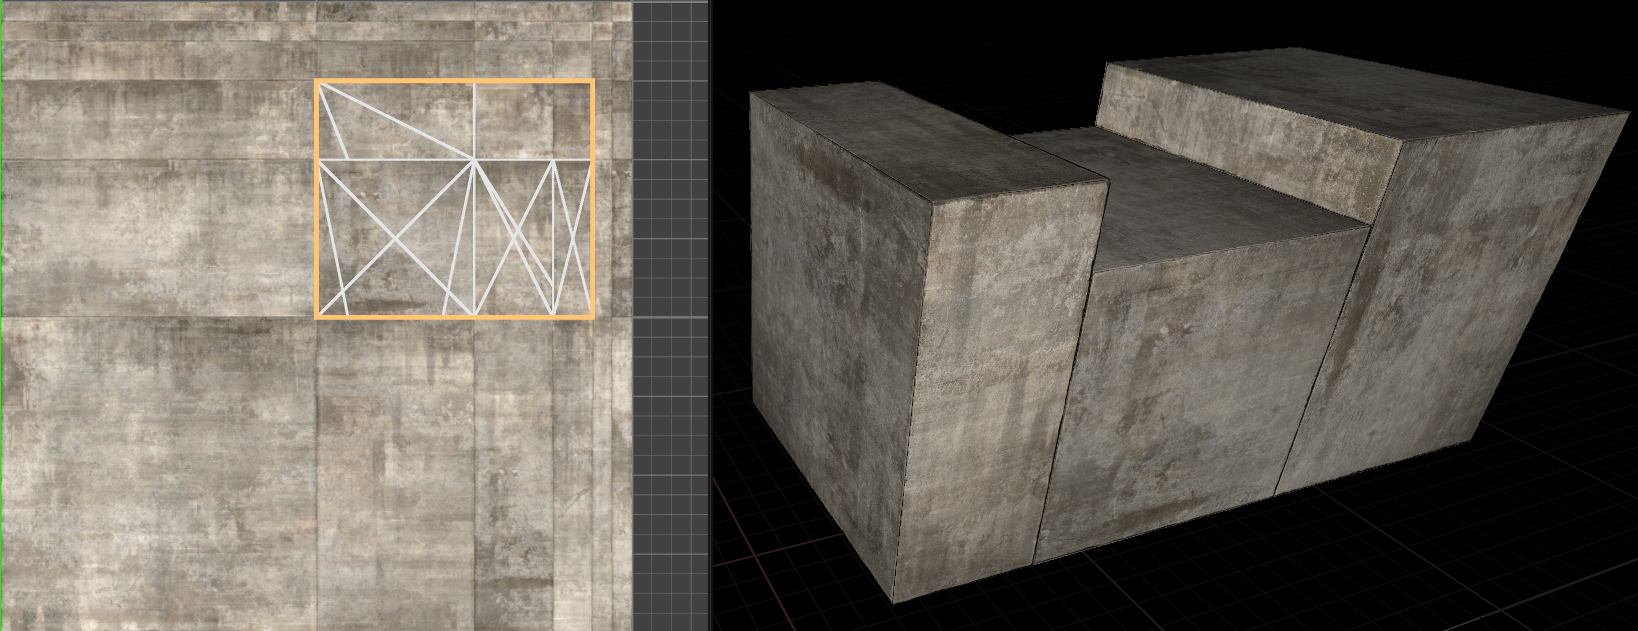 The resulting UVs of that mesh.
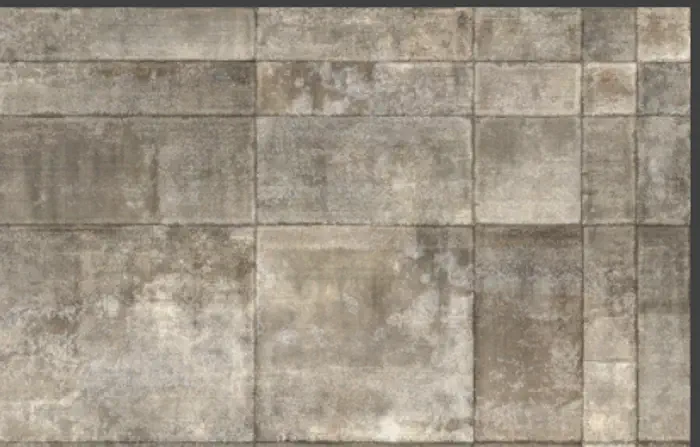
Hotspots can have many different patterns that may work differently depending on the hotspot data asset settings. Here's a hotspot texture that we would use for walls. 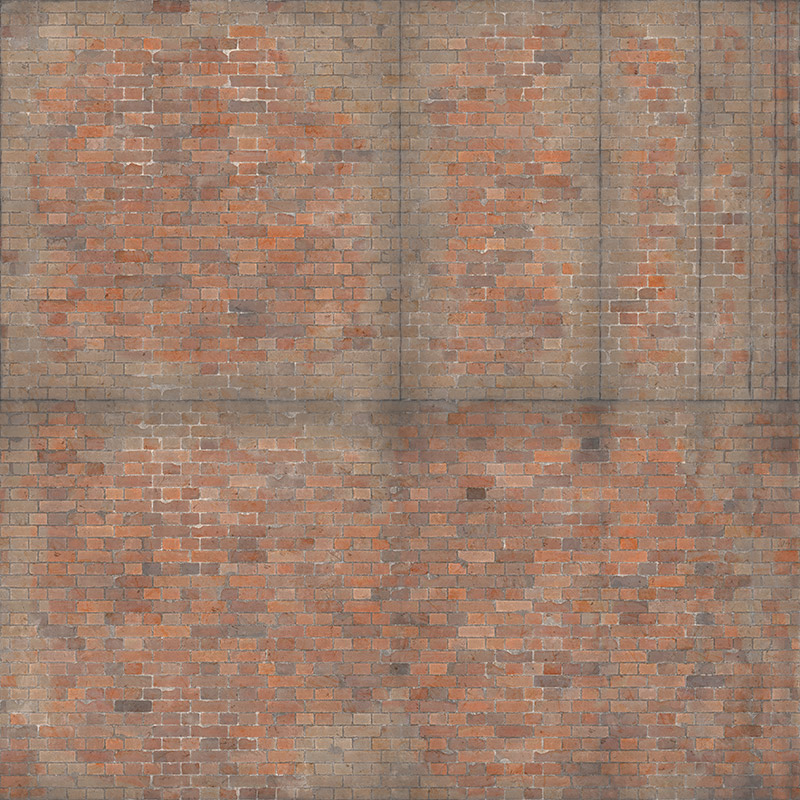 4k brick wall hotspot texture.
Creating Hotspot Data Assets
Hotspot Data Assets are the key to using hotspots in Scythe. They define the hotspot patterns and the materials that can be used with those patterns.
WARNING
Don't create a Hotspot Data Asset for every material. You should create a single Hotspot Data Asset for each unique hotspot pattern, and all the Materials that share that pattern should be added to it.
Even if you have a 512x512 hotspot texture and a 2048x2048 hotspot texture. If they share the same pattern, they should be in the same Hotspot Data Asset. Scythe will automatically scale everything properly when necessary.
To create a Hotspot Data Asset, Right Click a Material or Material Instance and select Create Hotspot. 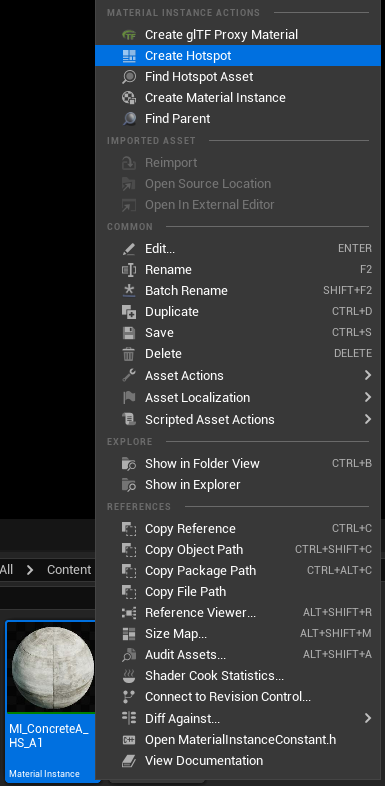
INFO
You can select multiple materials and create a single Hotspot Data Asset that will contain all of those materials.
Hotspot Editor
Open any Hotspot Data Asset to open the Hotspot Editor.
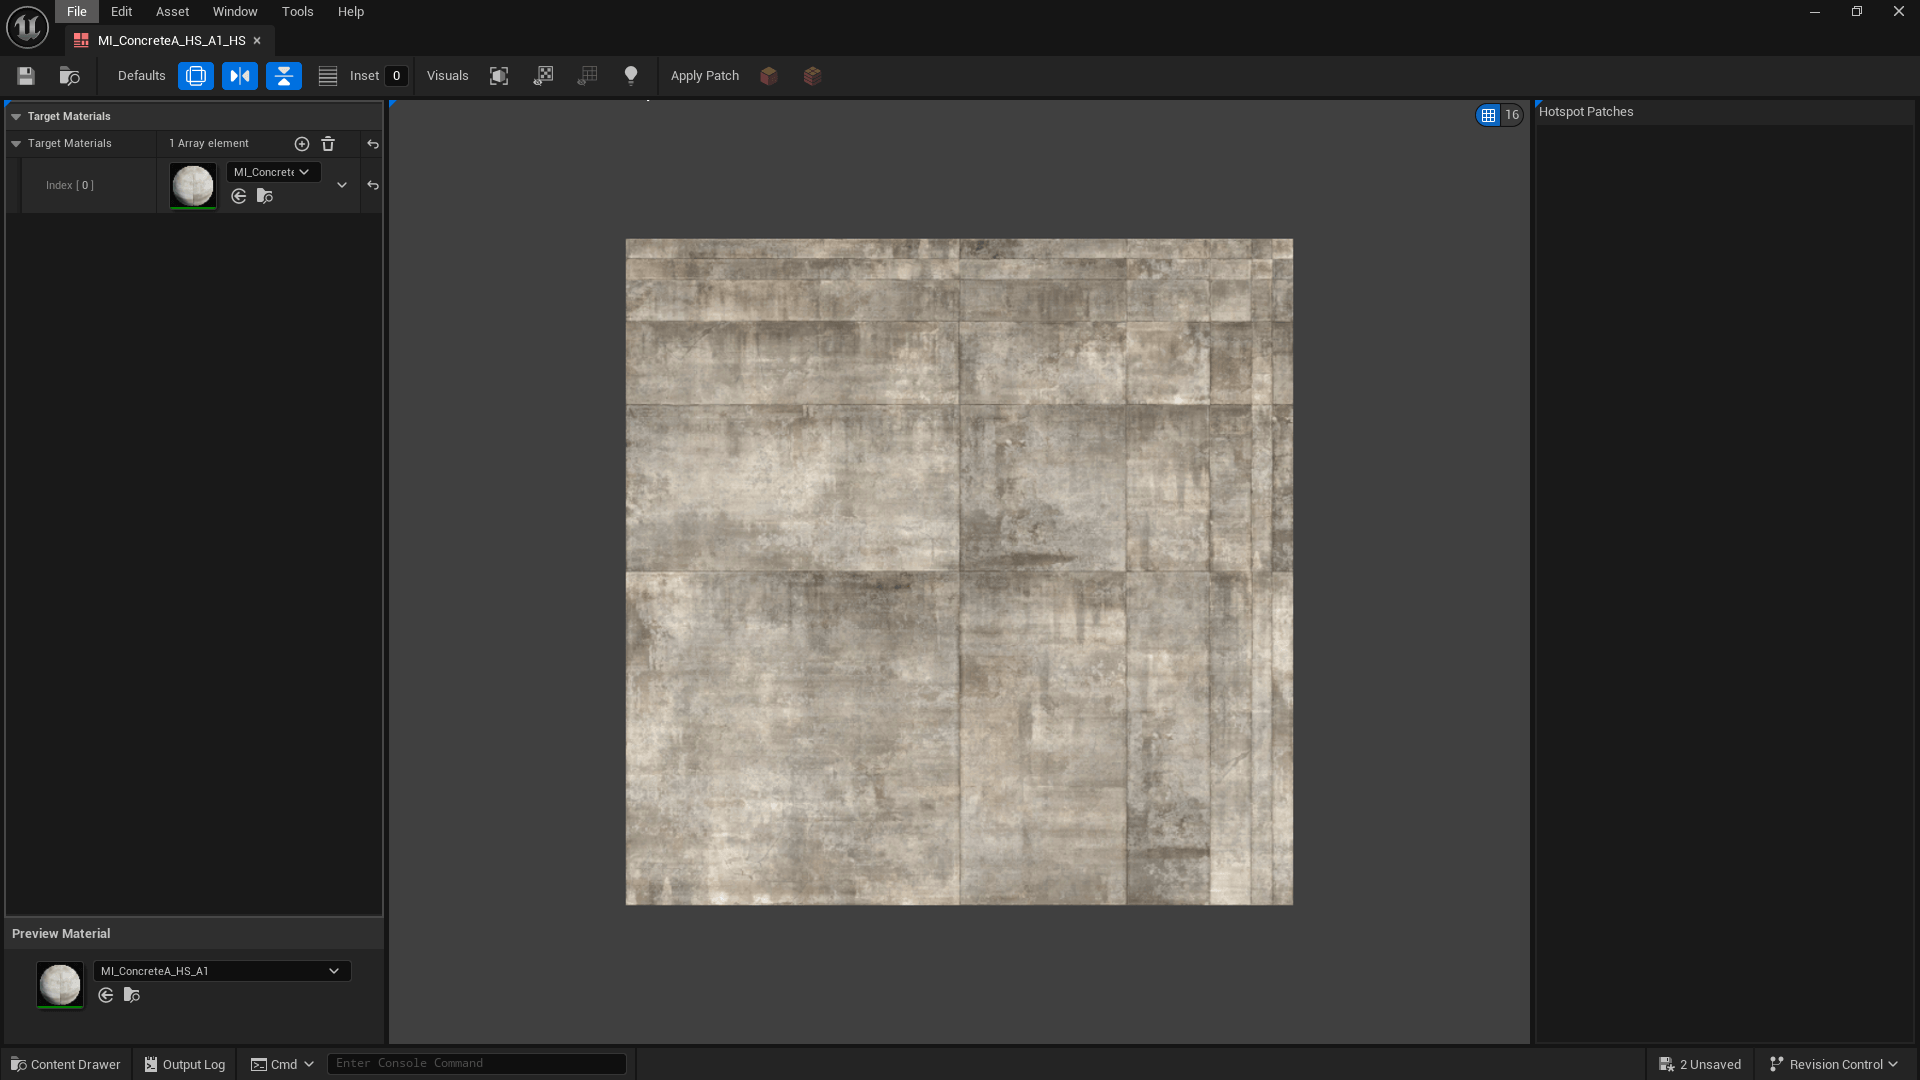
- Target Materials: This is where you add the materials that will use this hotspot pattern.
- Preview Material: This is the background material in the viewport.
- Hotspot Patches: This is where you'll see the hotspot patches that are defined in the hotspot texture.
Viewport Shortcuts
Change Grid Size [ or ]
Pan Right Click + Drag
Zoom Mouse Wheel
Create New Hotspot Patch Left Click + Drag
Hotspot Toolbar

The Defaults section applies to newly created hotspot patches.
Allow RotationAlt + A
Allows Scythe to rotate the hotspot patch to fit the mesh better.
You wouldn't want this on something like a wall hotspot or something you always want to keep upright.
Allow Mirror XAlt + D
Allows Scythe to randomly flip the face horizontally. This helps keep each mesh face looking unique.
Allow Mirror YAlt + E
Allows Scythe to randomly flip the face vertically. This helps keep each mesh face looking unique.
Allow TilingAlt + T
Scythe will treat tiling patches as a trim, meaning it's meant to tile forever. You'd use this for tilesheets. Can only use for patches that take up 100% of either the width or height of the texture.
InsetIf you need an inset (in pixels) for the hotspot patch. Useful if mipmaps are giving you issues with your bevels baked into the normal. You'd want a single pixel inset in that case.
INFO
It's possible to mix Tiling and non-Tiling hotspot patches in one texture. Tiling patches do "win" most of the time, though, so keep that in mind. You can always disallow Tiling in the Tiling Settings in the Modify Texture panel
Lit ModeL
Lit/Unlit rendering in the viewport.
Hide Material/TextureAlt + V
Hides the Material Preview background.
Hide HotspotsAlt + B
Hides the Hotspot Patches in the viewport.
Creating Hotspot Patches
Set your grid, then Left Click + Drag in the viewport to create a new hotspot patch.
You'll see them start to show in the Hotspot Patches list. You can modify each patch's setting here.
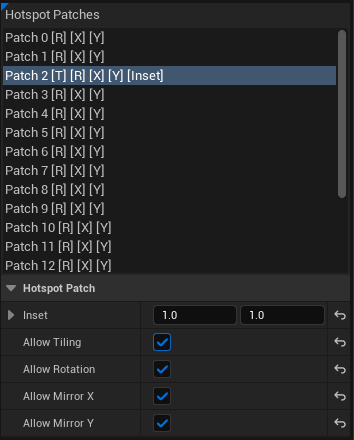
Each patch shows the setting(s) applied to it [R] Allow Rotate, [X] Allow Mirror X, [Y] Allow Mirror Y, [T] Allow Tiling, and [Inset] if there's any inset.
Once you're done creating patches, save the asset it'll attach itself to the materials you added to the Target Materials list. 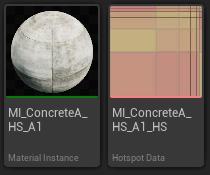
Walls
When creating hotspot patches for walls, you want to disallow rotation. This keeps the wall upright and looking correct. 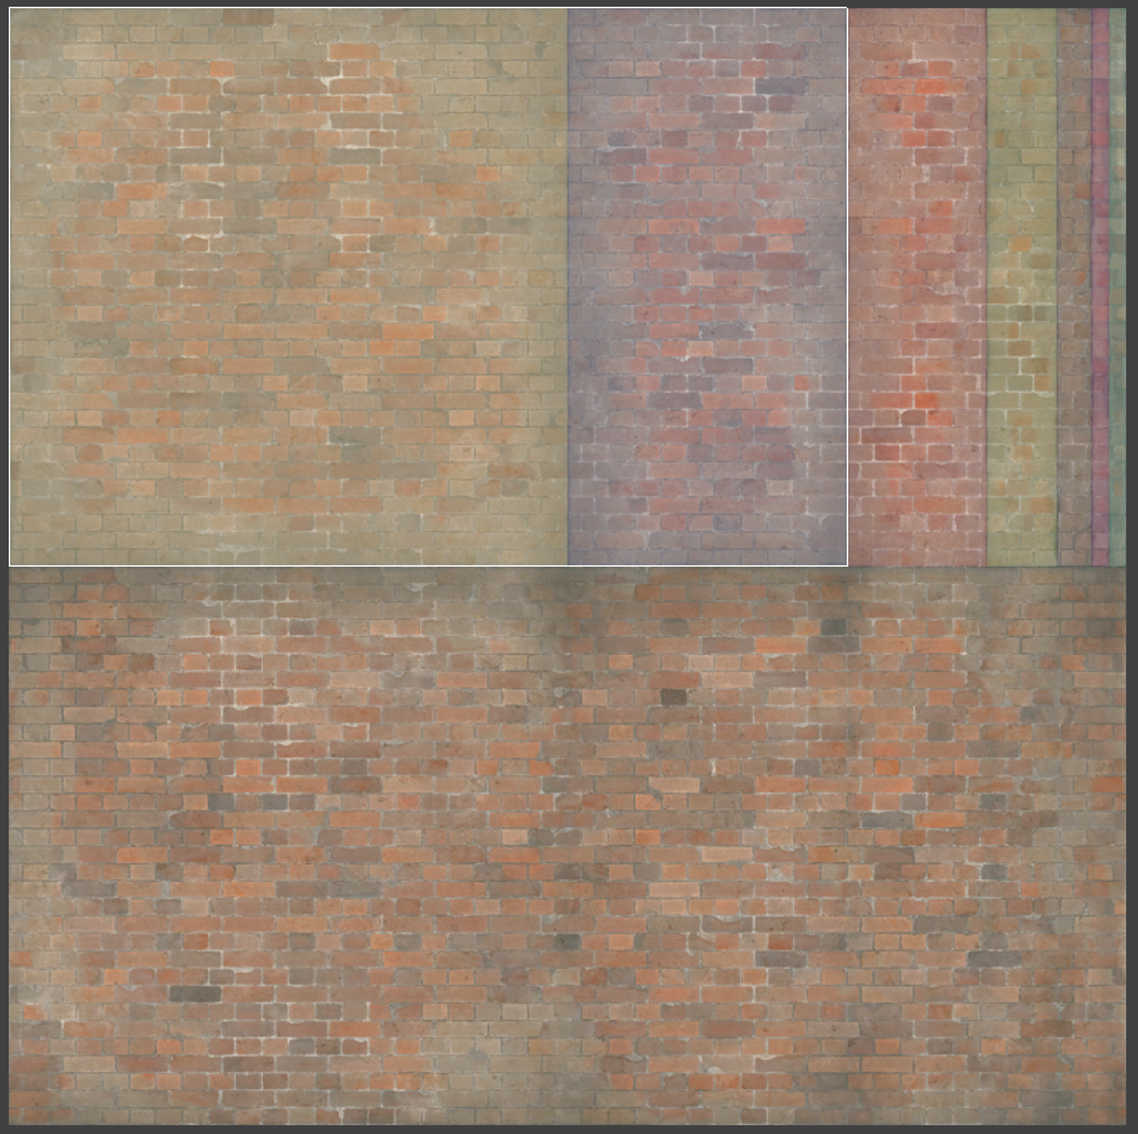
INFO
You can overlap hotspot patches. I find this most useful for a wall pattern like the above. I create an extra patch that includes 2 patches to have an extra match to help remove stretching on some face matches.
Applying Hotspots to Meshes
In the main Scythe Editor mode, make sure your Active Material is one of the materials that you made the hotspot data asset for. You can quickly do this by selecting the material in your content browser, it'll automatically set it as the Active Material.
There are 2 ways to apply hotspots to meshes:
HotspotShift + H
Scythe will try to find all the faces that are collinear to the selected face and treat it as a single hotspot.
Hotspot Individual FacesShift + F
Scythe will hotspot each face individually.
From the Hotspot Editor
You can also apply hotspots directly from inside the Hotspot Editor by clicking the hotspot patch you want (selection isn't built in yet, so you have to manually click it in the patch list) and selecting ![]() Apply Selected PatchShift + H or
Apply Selected PatchShift + H or ![]() Apply Selected Patch to Individual FacesShift + F from the top toolbar.
Apply Selected Patch to Individual FacesShift + F from the top toolbar.
You need to have a mesh or face selected in the main editor for this to work.
Apply Hotspot Settings
These are quick settings to tweak how hotspots are applied.
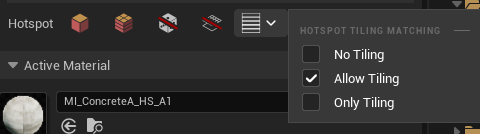
Tiling Settings
Disallow Random
Don't allow any randomizing of the patch, don't mirror it or rotate it, just find the best patch available.
Don't Apply Material
Don't apply the material when applying the hotspot, just generate the UVs.
No Tiling: Don't allow any tiling patches
Allow Tiling: Allow both tiling and non-tiling [Default]
Only Tiling: Only use tiling patches (if they exist)
 Mapping Mode
UV Unwrap Choices 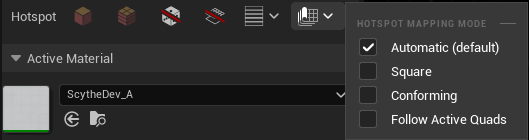
Automatic: Tries Square first and falls back to Conforming if it's too distorted
Square: Keeps things square-ish
Conforming: Conforms to the shape of the geometry
Follow Active Quads: Straightens quads/polygroups. Automatic never chooses this.