Hotspot Texture Maker
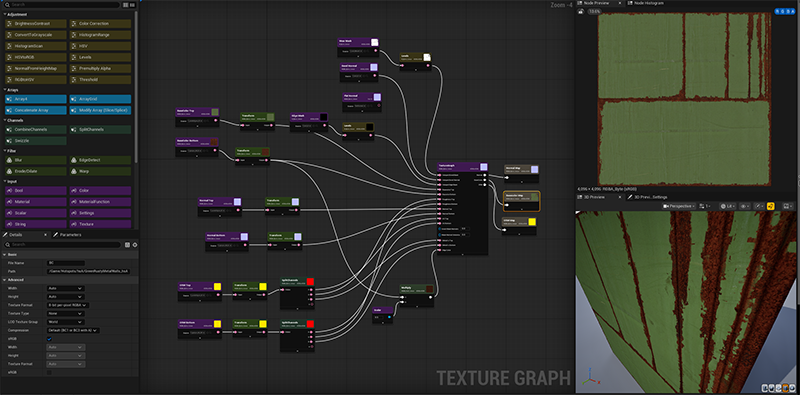
The Hotspot Texture Maker is a way to take normal textures (not included) and make hotspot/trimsheet textures out of them using the included hotspot layout masks and TextureGraph functions inside Unreal Engine's built-in TextureGraph plugin.
How it works
- Get a texture from anywhere to be the "top" layer (e.g. metal)
- Get a 2nd texture to be the "bottom" layer (e.g. rust) (or you can use the top layer to also be the bottom layer)
- Using the included texture graph function, pass them through it along with the included wear masks and edge masks
- Export to final textures
Outputs
- Base Color Texture
- Normal Texture
- Packed ORM Texture (AO, Roughness, and Metallic)
It is more hands-on than just a simple "put 2 textures in and hotspot come out" because it lets you dial in a lot of things to get a good looking hotspot depending on your goals. I've made a small tutorial series on how to make a few different hotspot textures using quixel textures.
It won't replace a dedicated texture artist in substance designer, but it'll get you great hotspot or trimsheet using one of the 9 included layouts.
Requires Unreal's built-in TextureGraph plugin to use (this plugin automatically enables it).
Where to Download
Patreon (Free for active patrons)
FAB ($15 USD)
Video Tutorials
Full Tutorial Series on Youtube
Hotspot Layouts Included
These are all the layouts the plugin comes with. No more layouts / masks will be added to the plugin, this is it!
These should cover most use-cases you need for your game because they're mostly inspired by what Valve has used in Half-Life: Alyx and Counter-Strike 2.
Even though I recommend ways to use each layout, it doesn't mean that's all you can use it for. It's why they're labeled by letter instead of by use. If you see a layout you like, and you think it'll work for your purpose, go for it.
Texel Density Notes
The max texel density this plugin supports is 1024px per 1m (or 1.28m) because the masks are 4k textures.
The rule of thumb for most of these layouts is the final hotspot texture size should be 4x your game's texel density (e.g. if you use 128px per 1m, you should resize your final hotspot textures to be 512px). The recommended size is beneath each layout.
That said, it's not written in stone, these are just guidelines to get the best hotspots according to us, so do whatever works for you.
Recommended Settings
The recommended hotspot editor settings will be beneath each layout for the best experience. Default settings are assumed for other settings.
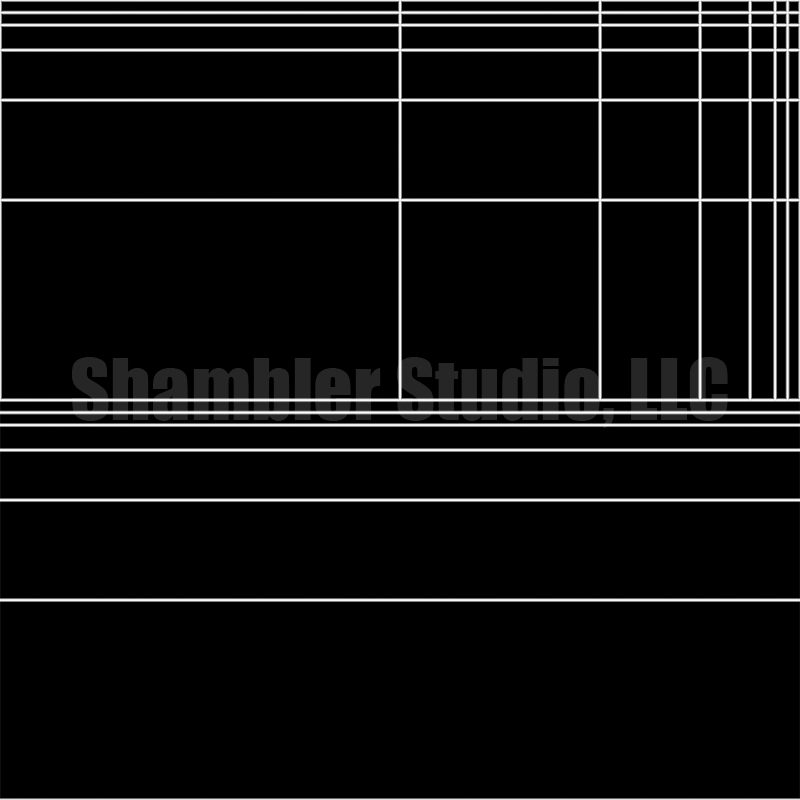
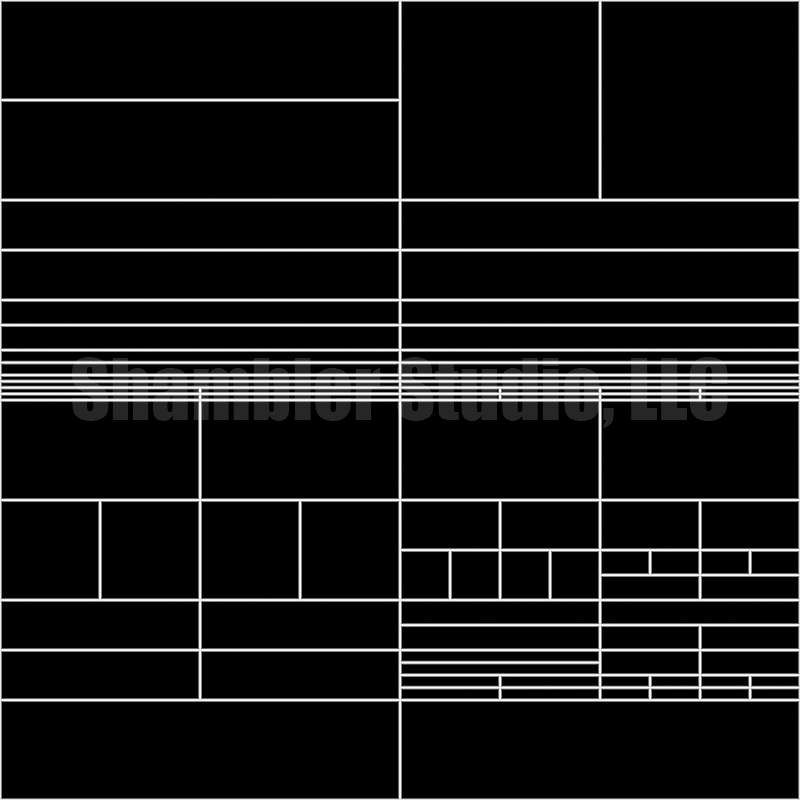
Layout A - Walls Only
Texture Size: 4x Texel Density (1024px per 1m = 4096x4096 texture)
Only used for walls. Make an extra hotspot patch that overlaps the first 2 patches for best coverage.
Hotspot Editor Settings
Set ![]() Allow RotationAlt + A to false
Allow RotationAlt + A to false
Set ![]() Allow Mirror YAlt + E to false (Optional)
Allow Mirror YAlt + E to false (Optional)
Layout B - Anything
Texture Size: 4x Texel Density (1024px per 1m = 4096x4096 texture)
The most generic hotspot layout. Use this for nearly anything.
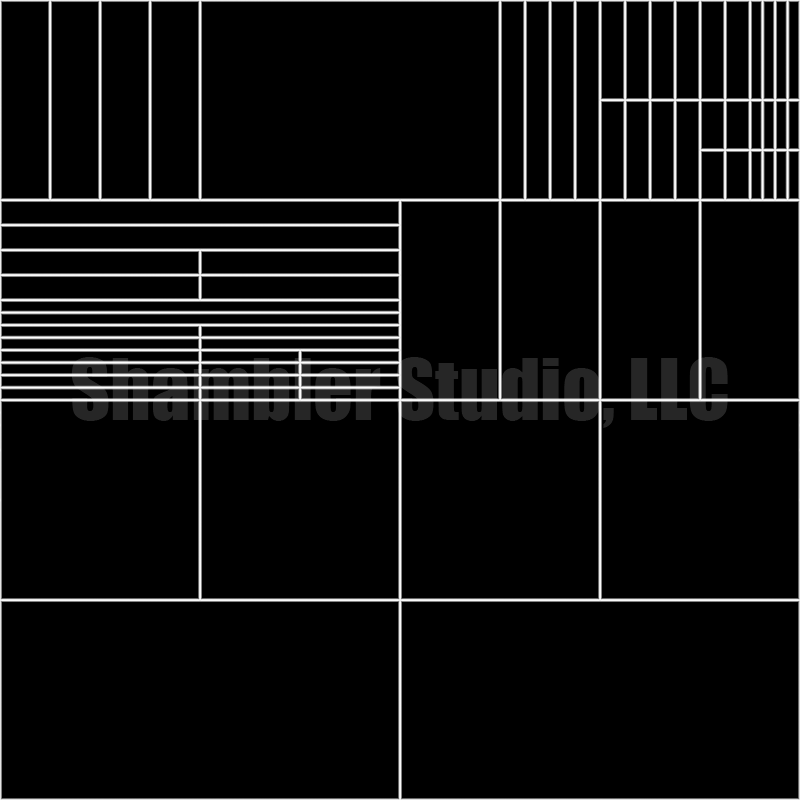
Layout C - Trim
Texture Size: 4x Texel Density (1024px per 1m = 4096x4096 texture)
A mix of normal hotspots and tiling trim (like a trimsheet) which allows it to be great for trim work, but also allows normal hotspots when the target size is close enough.
Hotspot Editor Settings
Set ![]() Allow TilingAlt + T to true on the bottom half-rows
Allow TilingAlt + T to true on the bottom half-rows
Layout D - Walls/Half-Walls Only
Texture Size: 4x/8x Texel Density (1024px/512px per 1m = 4096x4096 texture)
This should either be 4x or 8x your desired texel density. Use 4x if you want to use it as half-walls (waist height), use 8x if you want it to use it as normal height walls. If you use it as normal height walls, it's meant for a max of 512px per 1m for your texel density. Great layout for walls with a little extra support for horizontal beams/trims all in one texture.
However, I think it would also do well as half-sized walls if you want it to be 4x your texel density (e.g. waist height walls). Put some thought into this one and you can get a lot out of it.
Hotspot Editor Settings
Set ![]() Allow RotationAlt + A to false
Allow RotationAlt + A to false
Set ![]() Allow Mirror YAlt + E to false (Optional)
Allow Mirror YAlt + E to false (Optional)
Layout E - Anything
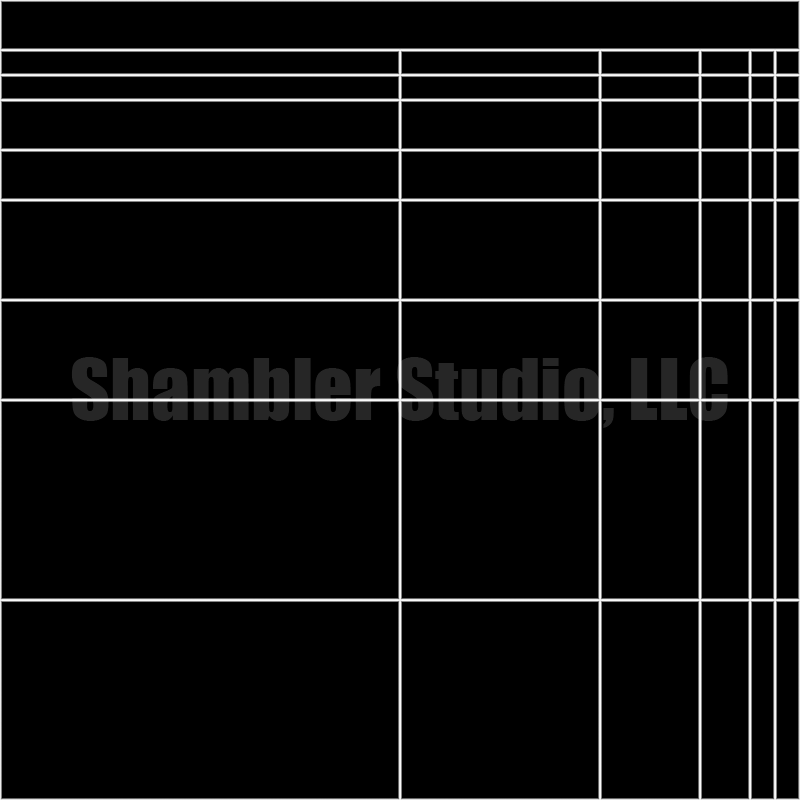
Texture Size: 4x Texel Density (1024px per 1m = 4096x4096 texture)
Very similar to Layout B, but a bit more niche to support a little more variety for longer pieces.
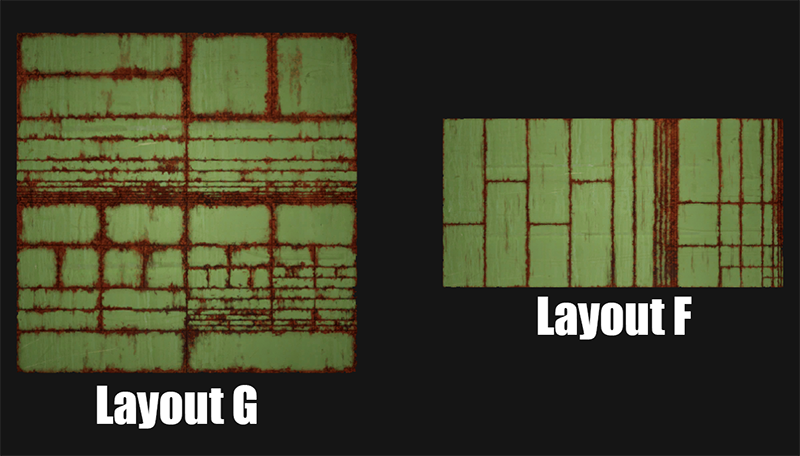
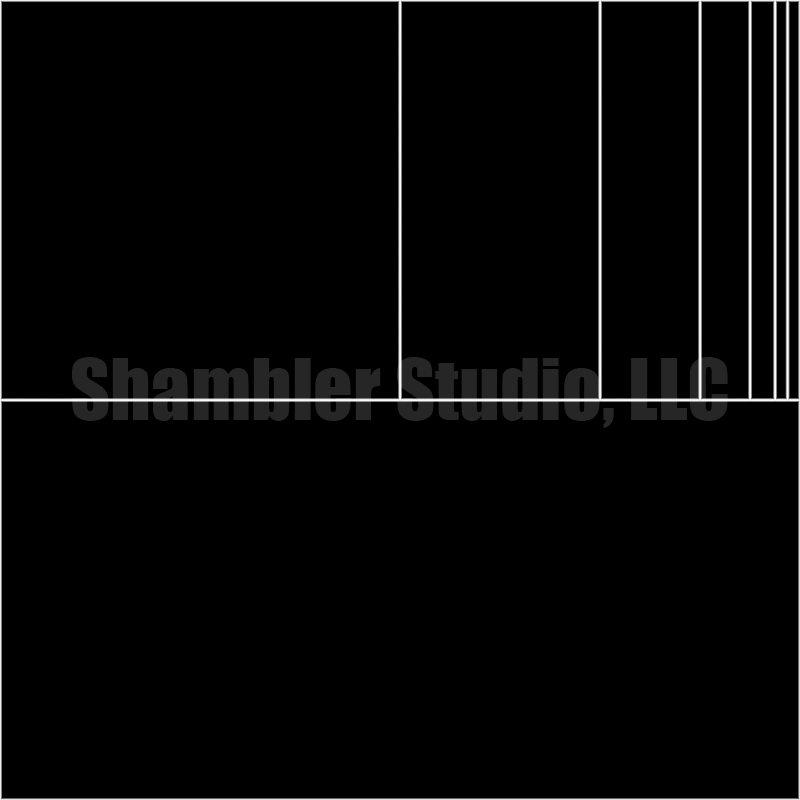
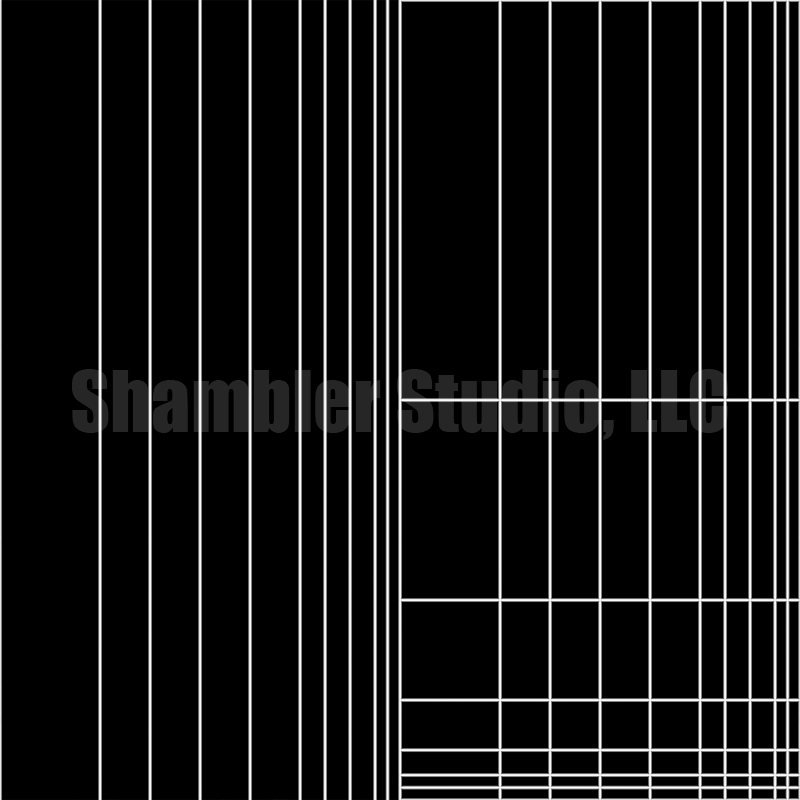
Layout F - Roof Tiles
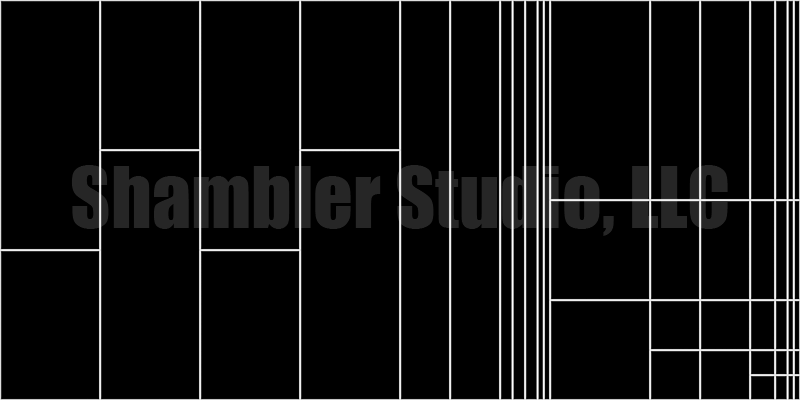
Texture Size: 4x Texel Density (1024px per 1m = 4096x2048 texture)
Recommended for roof tiles (metal works great). Even though it's extremely specific, it'll get a lot of use. Note that this is not a square texture.
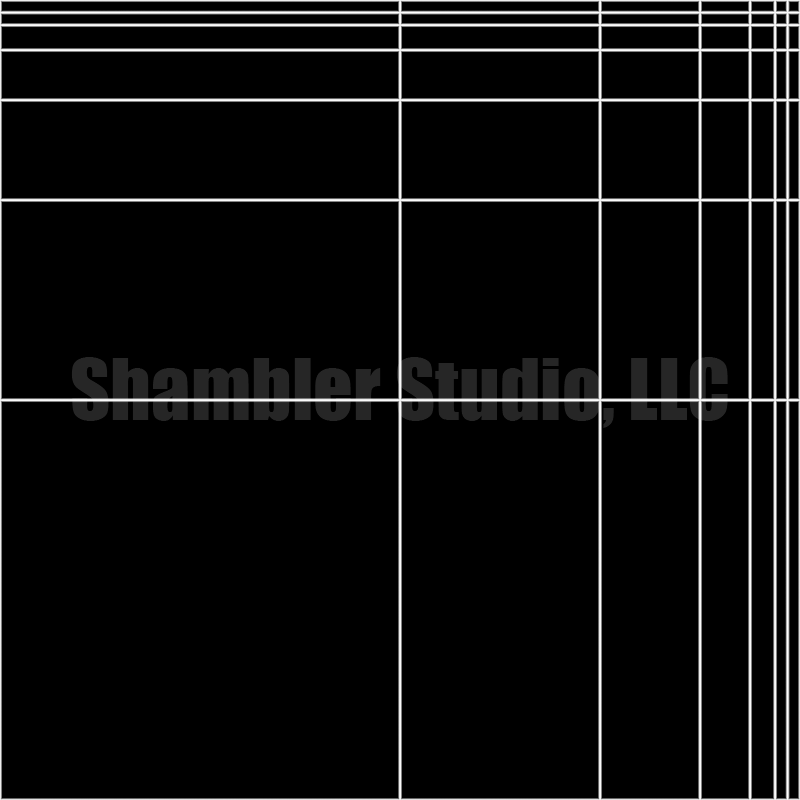
Layout G - Small Details
Texture Size: 4x Texel Density (1024px per 1m = 4096x4096 texture)
Meant for a lot of smaller details. Works great with metal/wood. Think control panels, rusted elevator lifts with a lot of smaller bits, furniture, etc. Looking at the layout, the biggest sized geo it's meant to cover is 200x50cm or 100x100cm.
Layout H - Generic Trimsheet
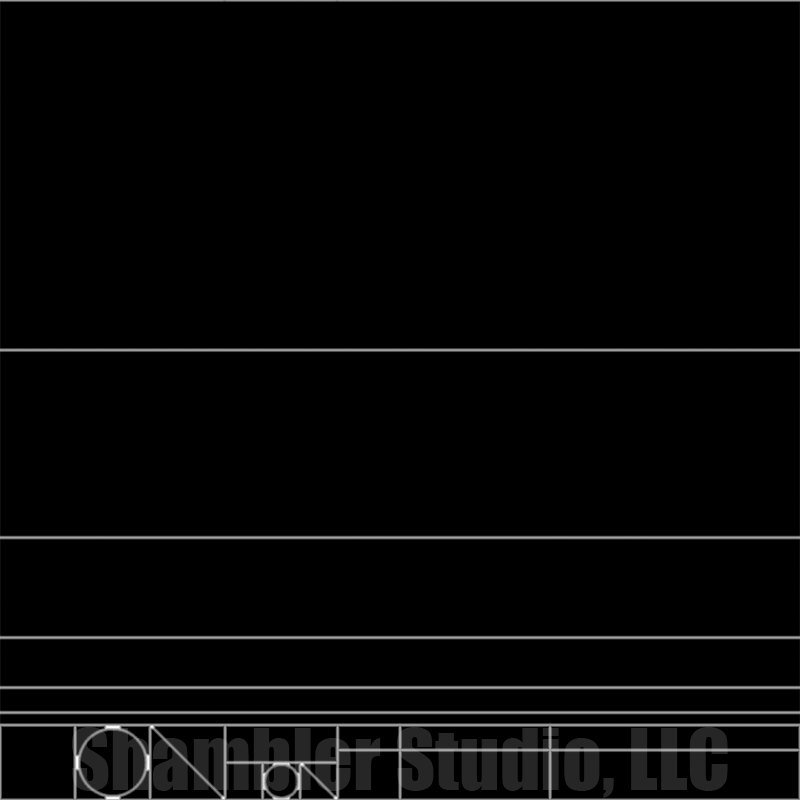
Texture Size: 4x Texel Density (1024px per 1m = 4096x4096 texture)
This is very similar to a prevalent layout you'll see in a lot of games, especially Counter-Strike 2. It's primarily used as a trimsheet with everything but the bottom section flagged to Allow Tiling.
Keep in mind that even though this layout has triangles and circles in it, it's not directly supported in Scythe as of this writing. For now, skip them when making hotspot patches.
Hotspot Editor Settings
Set ![]() Allow TilingAlt + T to true on everything except the bottom section
Allow TilingAlt + T to true on everything except the bottom section
Layout I - Window Frames
Texture Size: 2x Texel Density (1024px per 1m = 2048x2048 texture)
Primarily used for wooden/metal window frames. This is meant to be for smaller, more intricate geo, so pay close attention to the final sizing of this texture, as it's the only one that's intended to be 2x your texel density. So a 1024px per 1m is a 2k texture. Be sure to resize this appropriately.
Hotspot Editor Settings
Set ![]() Allow TilingAlt + T to true on the left half (Optional)
Allow TilingAlt + T to true on the left half (Optional)